• If you haven't done so already, please add a location to your profile. This helps when people are trying to assist you, suggest resources, etc. Thanks (Click the "X" to the top right of this message to disable it)

Keyboard axle removal

Status
Not open for further replies.

Glug

Well-known member
Site Supporter
Joined
Apr 17, 2018
Messages
862
Reaction score
469
Location
London UK
Hi folks, thought Id share this in case it helps somebody.

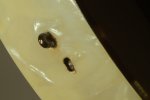
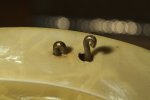
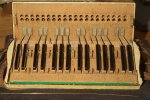
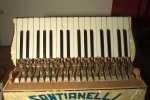
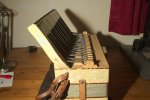
Ive got an old (1935ish) Santianelli 48 bass with some very minor keyboard problems. So I though Id take a break from fixing the valves to see how easy it is to get access to the key mechanism. Ive read AccordionRevival quite a few times and searched on here so after a poke or three I concluded the keys dont come off individually and its a twin axle design. Its got 2 axle ends visible on the bottom end of the keyboard and no holes or axle cover at the top end.
Keyboard: 1 keyboard.jpg
Axles: 6 axles.jpg
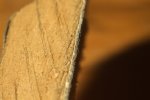
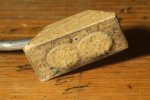
The first axle (upper left one) had the loop protruding just enough to get pliers on it, some twisting and pulling and it came out 2mm so I left it there for the moment. The second axle is the problem: the top of the loop is 2mm below the surface of the celluloid:
2 foot.jpg
So this is what I did:
1) Widen the hole slightly using a very small modelling scalpel, its now 4mm diameter
2) Push picture wire into the hole and hook it under the cut end of the loop using a jewellers screwdriver
3) Use nail pullers to pull on the wire
The pulling setup looks like this:
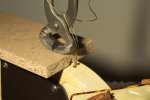
7 pulling.jpg
And heres the result:
8 pulled.jpg
Which should be perfectly acceptable when I put an axle cap on it :)
Certainly better than drilling a hole in the top end, think I owe myself a beer or four.
 
Last edited by a moderator:
  • Well Done!
Reactions: Tom
Great start. Let us know how it goes once you go further. A small tip: put painter's tape over the white keys and over the black keys and then you can remove the axles without a great risk that keys will fly everywhere. (Of course you can also pull bit by bit to remove one key at a time, but pulling out the axles in one go is faster.)
 
It's the getting them back in that's the tricky part! Like when you want to fix a key way down here but you have to take the axle out all the way, then get them all back in.
 
:) Think its going to be easier than getting it apart.
Pulling the first rod out took more levering and blocks of wood. Fairly sure this hasnt been taken to pieces for 80 years.
Luckily the keys have all got numbers stencilled on.
9 White out.jpg
The pallets are a bit weird too, think its Persian or Chamois Leather with no felt (judging by pictures on cgmmusical.co.uk)
10 Pallet side.jpg
11 Pallet bottom.jpg
 
Last edited by a moderator:
Glug post_id=59329 time=1526747035 user_id=2859 said:
...
Luckily the keys have all got numbers stencilled on.
...

I hope you checked whether that numbering is correct? I took apart an old Crucianelli and keys 9 and 10 (as numbered) were actually swapped. Dont just believe that when there is factory-numbering it will be correct!
 
No felt at all gives you no equalisation. You can use air pressure for roughing up the leather. But the principal equalisation will have been done by the pallets getting fixed to the pallet levers by filling up with wax while both pallet and key are fixed in perfect position, taping the wax basin off afterwards. That process does not really work with old (stiff and indented) leather seals. If you are planning on using felted pallets, you should probably use the thinnest available and even then it might necessitate rewaxing. Otherwise, try not to change anything, particularly concerning the lever/wax/pallet combination, and pray that stuff will choose to fit fine again.
 
Hmmm, I think I understand. So if I change the pallets I'm going to have to rewax them to make sure they're flat over the air holes.
Issues at the moment are some slightly stiff keys, one white key slightly operating a sharp, and some pallet clacking. Think I might leave the pallets for the moment and just do the mechanical issues with the keys, and maybe brush the existing pallets with an old toothbrush. If I'm rewaxing I may as well set the key height/action at the same time, so I'll maybe do that next time.
I did check the numbers :)
 
Glug post_id=59335 time=1526753678 user_id=2859 said:
Hmmm, I think I understand. So if I change the pallets Im going to have to rewax them to make sure theyre flat over the air holes.
Likely. If you are changing the pallet covering, you are probably going to get felted leathers and the felt will be good for a bit of equalisation but not all that much, and youll want thin felts anyway in order not to make too large of a difference.

So yes: messing in any way with the pallets and/or key level will likely imply a wax job. I dont have experience regarding how tricky or not this may be.
 
You want to be careful if you use a leather felt combo that the keys are not lifted enough that the hit the inside of the grill. The old instruments did not have a lot of clearance under the grill.
I often make up a craft felt and soft leather material myself for these jobs.

After waxing the new pallets to the arms and leveling the keyboard I will run a hair drier over the pads to soften the wax up and let the new pads settle.
 
Cheers, I didn't think of that, I'll have to measure the clearance, and buy a hairdryer.
What leather do you use ?
 
Yay, keys back in and everything works.

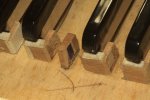
Fixed the stiff keys - turns out the guide slot the tip of the key goes up and down in was old furry softwood,
which resulted in quite a lot of friction.
12 Rough guide.jpg
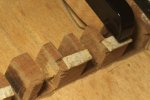
I smoothed the slots with a large nail file and faced them with UHMW tape*, which worked a treat.
13 taped guide.jpg
Having put it all back together I found a few pallets were wobbly, turned out the axle end of some keys had too much room to move in and could tilt slightly. A piece of tape on the axle end of the key fixed that completely.

Have to say I really like UHMW tape, first time Ive tried it :)


* tape I tried was TapeCase 423-3 UHMW tape, 1/2 inch wide from Amazon:
The UHMW film provides an excellent low friction, non-stick surface similar to PTFE. The film has a very high tensile strength and abrasion resistance. Common applications include drawer slides, chute liners, wear pads and guide rails.
I measured this tape as 0.11mm thick and it seems to stick to anything, including itself, but can be peeled off.
 
Last edited by a moderator:
That's great information and technique for future repairs ! Thanks for posting.
 
Status
Not open for further replies.
Back
Top