• If you haven't done so already, please add a location to your profile. This helps when people are trying to assist you, suggest resources, etc. Thanks (Click the "X" to the top right of this message to disable it)

Backpad fitting advice...

Rosie C

Well-known member
Site Supporter
Joined
Aug 25, 2023
Messages
914
Reaction score
1,614
Location
Cardiff, Wales
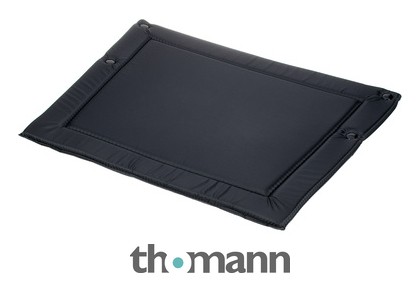
A backpad for my Concerto III arrived from Thomann today. Not wanting to drill more than necessary, does the location in the final photo look about right?

backpad - 1.jpeg backpad - 2.jpeg backpad - 3.jpeg
 
Hi Rosie,
I have a couple of accordions including a Roland which had the back pad factory fitted and the edge is virtually level with the keyboard. I have also fitted a couple my self the same way, but I wouldn't think it would make much difference putting it in a bit as you show.
One tip for drilling the holes correctly is to stick a bit of masking tape where you want the press stud to go, put some marking pen felt tip on to the male press stud on the back pad and carefully press down onto the tape for the first hole to be drilled.
It will leave a clear circle where you need to drill the first hole in the centre.
Take your time and do one at a time and they will match up perfectly.
I always start with the ones nearest the keyboard first, the the other two near the bellows.
Hope that makes sense.
 
For lost souls in the future looking for similar advice, this is how I interpreted @Pipemajor's very useful advice...

Black 'sharpie' pen liberally applied to the back of the snap fastener:
backpad2 - 3.jpeg

A little bit of electrician's tape to help gauge the hole depth:
backpad2 - 2.jpeg

1.5mm drill hole:
backpad2 - 1.jpeg

All done!
backpad2 - 4.jpeg backpad2 - 5.jpeg

It was £18 from Thomann. There would have been £10 postage, but I waited until I had a larger order going in. Overall it's a good kit. Only four fasteners and 4 screws, which is a bit mean - otherwise I've no complaints!
 
Congratulations- looks to be a nice clean installation. Your graphic acvice will surely help others.

An issue- not present in your case- is with the security of the snaps on the accordion back. Many accordions have backs such that a layer of fiberboard is screwed over the back of the instrument behind the keyboard extending down to just by the bellows frame. When the snaps are emplaced through the fiberboard the screws holding them in are frequently only holding in the fiberboard (vice solid wood). The backpad installation is just fine until you pull it off. Over the years I've had many a snap pull right off the accordion with the backpad rather than unsnapping and separating as intended. The best solution is to locate the snaps where they'll get a good grip in the accordion body- but this can be difficult to achieve when using a new backpad; the snaps go where the preinstalled snaps on the pad demand. You can remove the preinstalled snaps and emplace new ones but this can be irksome in practice, and without familiarity in the process can result in cosmetic issues (on the backpad which is ... on the back in any case but for "A type" personalities this can be annoying ).

Failing relocating snaps, drilling the starter holes for the snap screws on the small side for a tighter hold and (heaven forfend) placing a dab of super glue gel on the threads of the screw and back of the snap as it is installed can offer a more secure attachment of the snap to the fiberboard back of the accordion.

Again, your installation appears to be a model one.

Henry
 
A good job well done Rosie. (y)
If you are concerned that the snaps may pull out of the back, Perhaps a little square of thin plywood glued on behind the screwholes would help. The screws could then have a much firmer fixing.
Anothe suggestion would be to use long thin bolts and nuts with a large washer behind them.
 
A good job well done Rosie. (y)
If you are concerned that the snaps may pull out of the back, Perhaps a little square of thin plywood glued on behind the screwholes would help. The screws could then have a much firmer fixing.

I like that idea. Of course I'd have to learn how to remove the keyboard, but I'm on an accordion learning curve anyway so that's something to look to do.
 
Interesting! Never thought of doing that. Is this a thing? I never remove my backpads. My old Excelsior 930 has a beaten, flimsy backpad and just yesterday I thought about ordering a new one to replace it since it actually dug into my chest when playing briefly.

Velcro is a very good idea. Easily adjusted and removed, no drilling, and holds better than snaps if you use longer pieces. I'm going to look into it.
 
My own experiences using velcro have been a bit iffy. The adhesive backing on the self stick varieties just doesn't seem at all suitable for the longer (as in a couple of months) haul; it seems to degrade into a slimy mass. The backing on the sew on types is, at least for me, incredibly resistant to gluing and the only way I could reliably fasten it onto the accordion fiberboard backs has been with staples.

You can, of course, sew it onto the pads- it's the instrument attachment half that causes me issues.

Others may have no issues- I'd be interested to hear how they affix it. Properly set in place it has obvious up sides.

Gee- I haven't tried wax....
 
i have long kept a variety of 3 inch wide velcro rolls around the shop,
and on accordions whether on the front for mounting wireless units
or on the back for pads, first affixing the soft side to the accordion in
a far far wider area than you need to actually HOLD the target item
and then attaching the necessary amount of grabby velcro to the item
gives a lot of leeway for hold power, which equals less or zero
pull-ups leaving sticky stuff to have to clean off

the soft velcro side blends in and dissapears on stage on a black
or white accordion.. on the white FR3 i put a soft strip the whole
way down the front, hiding the ugly brown "roland" and then
holding the WIDI tx near the bottom and the Audio Line 6 near the top

in areas where the hold must be more intense in a smaller area,
i use a super thin but very agressive double sided adhesive tape
applied to the soft side of the velcro, which grabs the normal hold
sticky stuff in a death grip, and it then grabs the accordion (or FX pedal etc.)
more firmly than the usual peel and stick

the only caveat is, as always, test the stuff in a tiny unobscure area
to make sure it will not re-act to/melt the finish

using velcro is always reversible, though yeah takes a bit to get
the residue cleaned off.. i have strong mylar packing tape i use like
when you get your extra hairs waxed (but you havn't tried wax?)
hehehe
to rip away most adhesive leftovers, then follow with the fine cleaning
 
Sorry, Rosie, if I rain on you parade.

But I think the location of the pad as shown in your initial post is better. The pad would cover the whole bellows, opened or closed. That is the purpose of the pad.

The photo of the installation shows the pad cover to the left edge of the bellows when they are closed. That means there is nothing protecting the expansion part of the bellows when they are opened.

Or am I missing something?
 
Or am I missing something?
mostly that one never wants to drill holes into the bellows chamber,
as that risks compromising compression.. moving the pad back that far
i think would put it on the wrong side of the gasket

but you can if you want to, i wouldn't..
 
Sorry, Rosie, if I rain on you parade.

But I think the location of the pad as shown in your initial post is better. The pad would cover the whole bellows, opened or closed. That is the purpose of the pad.

The photo of the installation shows the pad cover to the left edge of the bellows when they are closed. That means there is nothing protecting the expansion part of the bellows when they are opened.

Or am I missing something?

For me at least, the problem I was trying to address was the bellows catching things just as they close, e.g. the signal cable from my in-ear-monitors when I'm making a video! It's fixed that, so I'm happy. That said, if the back pad was an inch longer that would have been better.
 
Back
Top